When your Adsense account is disabled, you NEED your publisher ID to file your appeal. If you've removed your ad codes from your website, or if you have a YouTube channel, you'll have problems finding that Publisher ID if you haven't kept track of it.
The time to store that information in a safe place is BEFORE you find yourself with a disabled account. In truth, no publisher wants to have their account disabled, and most publisher's going into Adsense don't give much thought to the chance that their account may be disabled, so most don't think much about safe-guarding their adsense information.
FIRST STEPS
The first steps are to create a new folder in the "My Documents" section of your computer. Title it simply "Google Stuff".
Inside that new folder, create a folder for Adsense, and one for Blogger (if you use Blogger), and one for "Google Account".
Go to your email account and download emails you still have from Adsense - if you still have your approval email, you should save that.
To save mail from your gmail account, open the email, click the "printer" icon in the upper right of the mail. That will open your email on a printable page. Select the small arrow from the printer on the left hand menu to get the drop down menu - you don't actually want to print the page, you want to save it. Choose the option to save as a .pdf and save the email to your Adsense folder.
Any other important emails you've received from Adsense should also be saved - policy violation notices, etc. can be saved for future.
Next, you'll want to login to your Adsense account (www.google.com/adsense) and go to your Account Settings page. Take a screenshot of that page. The account settings page in your adsense account provides all the personal information associated with your Adsense account - your login, your Publisher-ID, your Customer ID (which is different from your Publisher ID), your payment details, etc. It will even provide a list of sites you've authorized to display your ads if you use the allowed sites list.
 |
| A larger version of the above page can be downloaded here. |
Save the screenshot in your Adsense folder.
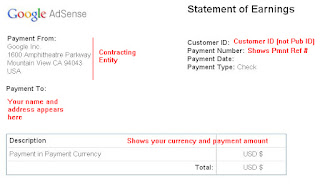
Finally, go to your Payments Page. If you aren't a US publisher, you don't receive tax forms like the 1099, but you can access a printable "earnings statement" for each payment you've received. On your payments page, click the "details" link next to the payment issued, and click the "Statement of Earnings" at the bottom of the blue box. That will load a printable earnings statement. You probably don't really want to print them, so take a screenshot for the Statement of Earnings and save it in your Adsense folder. Save as many as you think you'll need.
 You should save a copy of your earnings statement each time you get paid. If you should be unlucky enough to have your Adsense account disabled, you will not be able to get back into your account to get this information, so it only makes good sense to get it at payment time, each month.
Now you not only have the information you'd need to file an appeal for a disabled account, but you have records of previous payments and all the data associated with your Adsense account. This takes very little time to set up, but can save you a world of grief in the future.
NEXT STEPS
 Because your Adsense account is also linked to your Google Account, you'll want make sure you go to your Google account page and set up the security information if you haven't already done so. As well, click the link on the left of the page for "Data Liberation". The Data Liberation page will allow you to download information stored for a number of Google products, like all the images in your Picasa albums, or the information in your Google Profile, and your circles. Simply download the information package to your Google folder on your computer.
Along with that, you may also want to take a screenshot of your Google account page, since it also provides the login information for your Google account, and the alternate email address you've provided (if any).
Lastly, if you use Blogger for any of your sites that use Adsense, download your blog to back it up (do so regularly), along with your template. You can save the template by going to the "Template" page in your Blog and saving the xml file.
To export and backup your blog's data (posts, etc.) click the settings link, then choose "Other" and from that page, select "export blog". This will export your posts in the proper file format and you can save these in your Blogger folder on your computer. Should something happen to your blog, you can restore it using the "import" button on the same page.
by J. Gracey Stinson


0 comments:
Post a Comment